
If you love lemon desserts that strike the perfect balance between tangy and sweet, this Magic Lemon Cobbler is going to steal your heart.
With a rich lemon filling that settles into a silky custard base and a golden buttery crust that rises to the top like magic, this easy recipe delivers comfort and flavor in every bite.
Whether you serve it warm with ice cream or chilled from the fridge, this cobbler is a zesty treat made for citrus lovers.
Why You’ll Love This Recipe
Super easy to make – only 15 minutes of prep and no mixer required.
Bright lemon flavor – thanks to both lemon filling and optional lemon extract.
Delightfully textured – creamy lemon base and golden cake topping.
Crowd-pleaser – great for holidays, potlucks, and lemon lovers of all ages.
Customizable – use lemon curd, homemade pie filling, or a store-bought version.
What You’ll Need (Ingredient Highlights)
Here’s a quick overview of the key ingredients for this Magic Lemon Cobbler:
Unsalted Butter – melted in the baking dish to form a crisp, buttery edge.
All-Purpose Flour – forms the base of the cobbler batter.
Buttermilk – gives the batter tenderness and a slight tang.
Sugar – sweetens the cobbler base and balances the lemon.
Lemon Pie Filling or Lemon Curd – provides the bold citrus flavor.
Lemon Extract (optional) – intensifies the lemon essence.
Vanilla Extract – adds warmth and aroma to the batter.
Pro Tips Before You Start
Melt the butter directly in the pan – it saves time and helps crisp the edges.
Do not stir once you layer the batter and lemon filling – this creates the cobbler magic.
Use lemon curd for a richer filling or canned pie filling for ease.
Homemade buttermilk hack – stir 1 tbsp lemon juice into 1 cup of whole milk.
Check doneness by inserting a toothpick – it should come out clean or with moist crumbs.
How to Make Magic Lemon Cobbler
Step 1: Preheat the Oven and Prepare the Pan
Preheat your oven to 350°F (175°C).
Place ½ cup unsalted butter (1 stick) into a 9×9-inch baking dish.
Let it melt in the oven while it preheats – this takes 3 to 4 minutes.
Carefully remove the pan once the butter is melted.
Step 2: Mix the Cobbler Batter
In a large mixing bowl, whisk together 1 cup all-purpose flour, 1½ tsp baking powder, ¼ tsp salt, and 1 cup granulated sugar.
Add 1 cup buttermilk, 1 tsp vanilla extract, and 1 tsp lemon extract (optional).
Stir until smooth and lump-free.
The batter should be pourable.
Step 3: Pour the Batter Over the Butter
Pour the cobbler batter directly over the melted butter in the baking dish. Do not stir.
The layering is essential for forming the magic custard layer at the bottom and a cakey crust on top.
Step 4: Add the Lemon Filling
Spoon 1 can (21 oz) of lemon pie filling or lemon curd evenly over the batter.
It will float above the batter at first but will sink during baking – forming the rich, tangy bottom layer.
Step 5: Bake the Cobbler
Bake the cobbler in the center of your preheated oven for 45–55 minutes.
The top should puff up and turn golden brown.
If it still jiggles too much in the center, let it bake another 5 minutes.
Step 6: Let the Cobbler Cool
Remove the dish from the oven and let it cool for 10–15 minutes.
This resting period allows the filling to settle and the texture to firm up.
Step 7: Serve and Enjoy
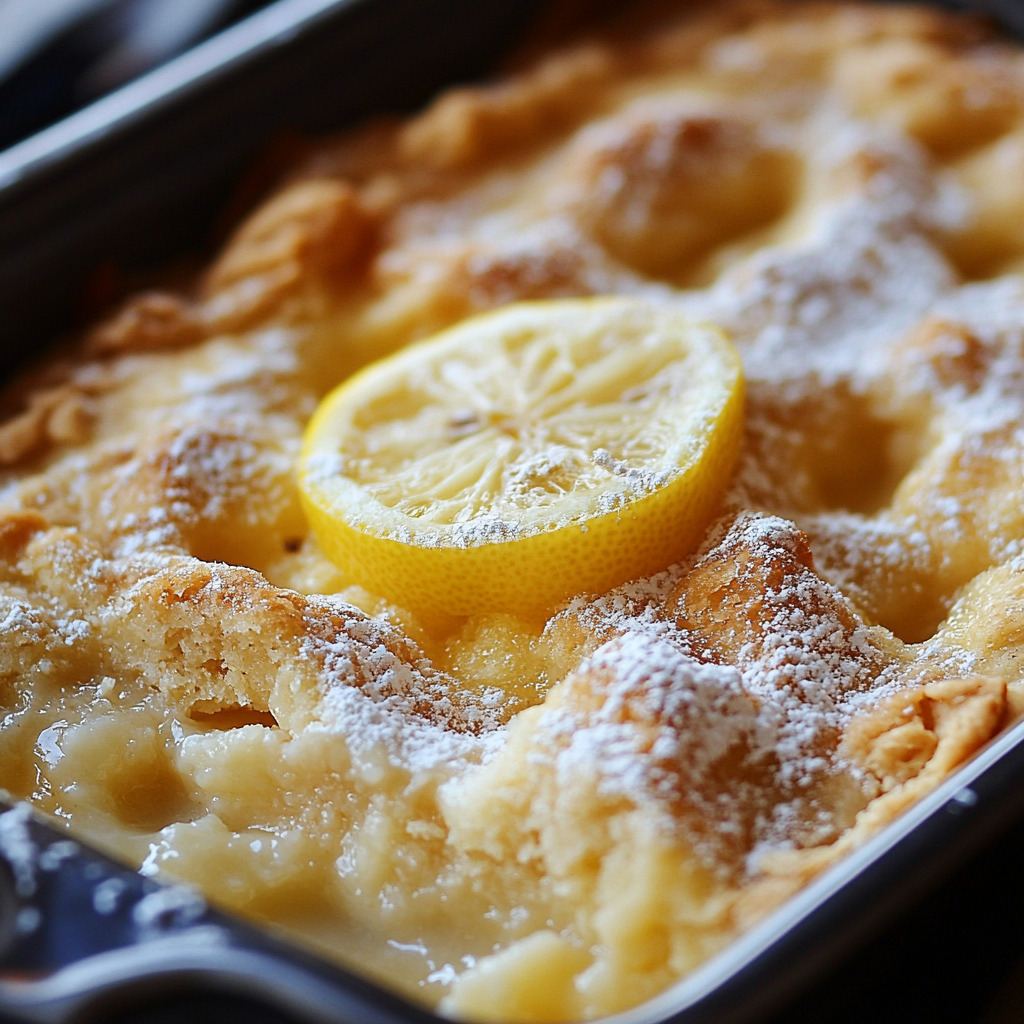
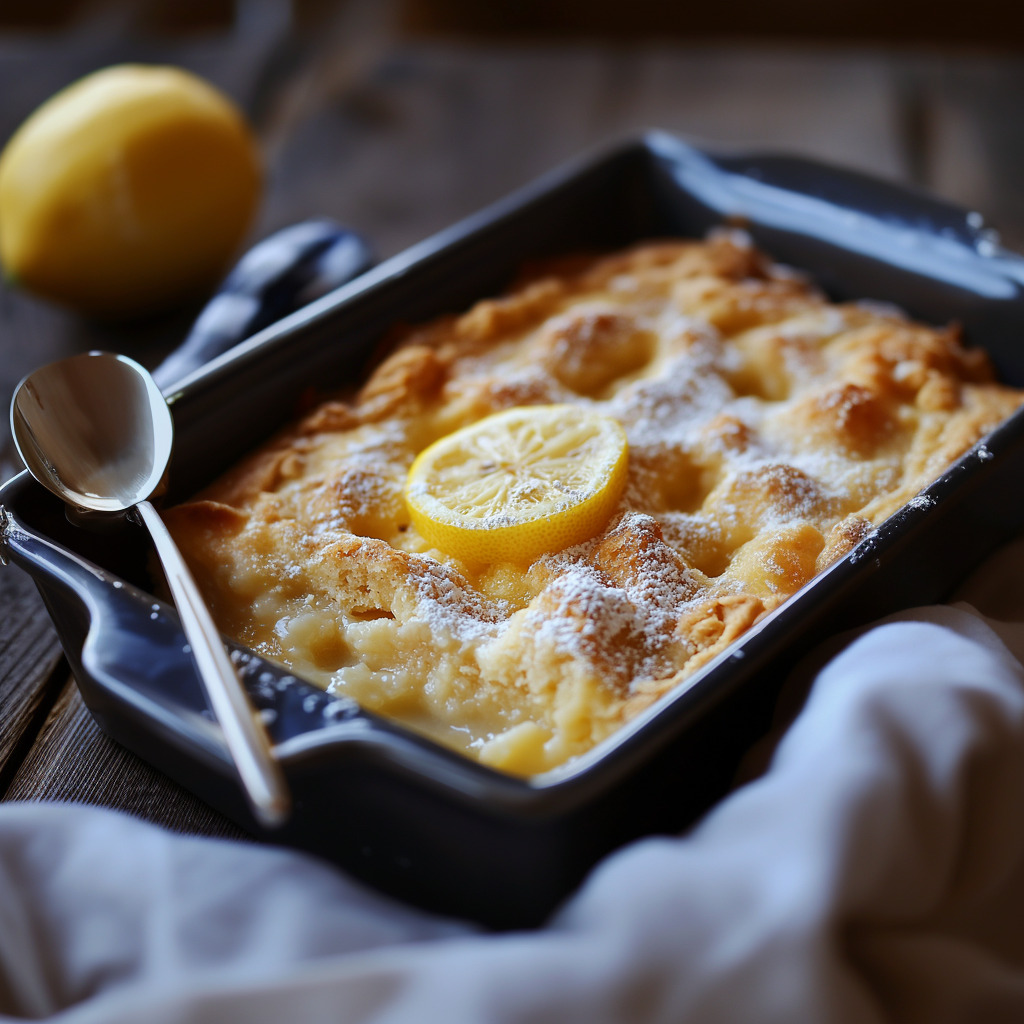
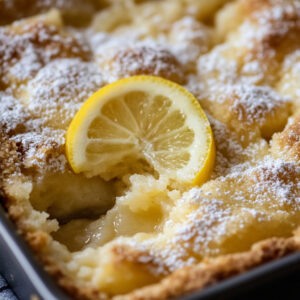
Cut into squares and serve warm.
You’ll get a creamy lemon base and fluffy, golden topping in each bite.
Top with whipped cream, vanilla ice cream, lemon zest, or powdered sugar if desired.
What to Serve It With
Vanilla ice cream
Whipped cream
A dusting of powdered sugar
Fresh lemon zest or slices
Iced tea or hot coffee
Variations / Substitutions
Fruit options – Try with blueberry or raspberry pie filling instead.
Dairy-free – Use almond milk + lemon juice instead of buttermilk, and vegan butter.
Add texture – Sprinkle toasted coconut or almonds on top.
Make it mini – Use ramekins for individual servings.
Lemon zest – Add fresh zest to the batter for extra brightness.
Storage & Leftovers
Fridge: Store leftovers covered in the fridge for up to 3 days.
Freezer: Freeze individual portions in airtight containers for up to 2 months.
Reheat: Warm in the microwave or a 300°F oven until heated through.
FAQs
Can I use lemon curd instead of lemon pie filling?
Yes! Lemon curd creates a richer, creamier flavor. Use the same amount.
Do I have to use buttermilk?
Buttermilk makes the cobbler more tender, but you can use milk + lemon juice as a substitute.
Can I use a different pan size?
Yes. An 8×8-inch pan will make a slightly thicker cobbler.
Avoid pans larger than 9×13 or it will be too thin.
Can I make this gluten-free?
Yes. Use a gluten-free all-purpose flour blend with 1:1 substitution.
Why can’t I stir the batter and butter?
Stirring would prevent the magic layering that makes this dessert special.
How do I know it’s fully baked?
The edges should be golden and a toothpick in the center should come out mostly clean.
Is this recipe good for holidays?
Absolutely! It’s festive, citrusy, and easy to prep ahead.
Final Thoughts
This Magic Lemon Cobbler is the kind of dessert that surprises and delights.
With just a few simple ingredients, you get an elegant, citrus-packed treat that looks impressive and tastes even better.
It’s perfect for spring and summer but works all year round when you want something light, tangy, and sweet.
Whether for guests or a cozy night in, this lemon cobbler never disappoints!
Magic Lemon Cobbler
Ingredients
- 1/2 cup unsalted butter 1 stick
- 1 cup all-purpose flour
- 1 1/2 tsp baking powder
- 1/4 tsp salt
- 1 cup granulated sugar
- 1 cup buttermilk
- 1 tsp vanilla extract
- 1 tsp lemon extract optional
- 21 oz lemon pie filling or lemon curd
Instructions
- Preheat oven to 350°F. Melt butter in a 9×9-inch dish.
- Mix flour, baking powder, salt, and sugar.
- Add buttermilk, vanilla, and lemon extract. Stir until smooth.
- Pour batter over melted butter (do not stir).
- Spoon lemon filling on top evenly.
- See full steps with tips & photos → https://p4pd.org/magic-lemon-cobbler/
Notes
- For extra tart flavor, use lemon curd instead of pie filling.
- Want more golden crisp edges? Use a metal pan instead of glass.
- Best enjoyed fresh, but leftovers can be refrigerated for up to 3 days.
- Reheat individual servings in the microwave for 20–30 seconds.